Introduction
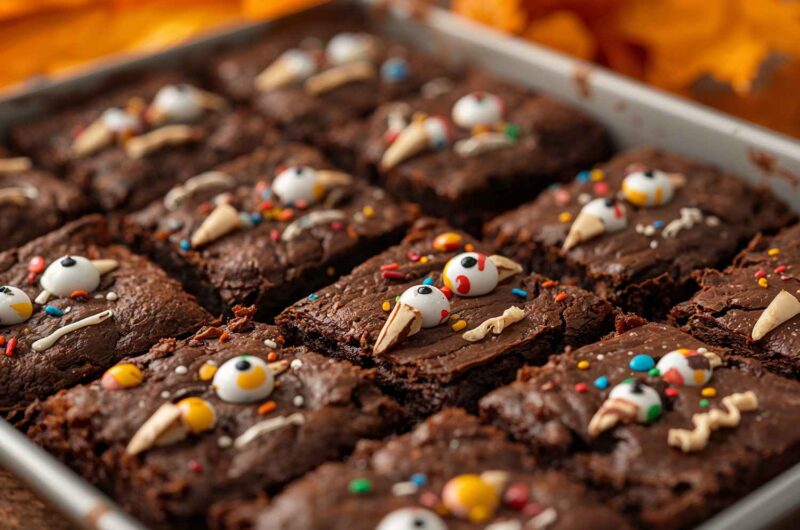
Halloween Monster Brownies with Candy Eyes are spooky, fun, and utterly delicious! These rich, fudgy brownies are decorated to look like silly or scary monsters using colorful frosting, candy eyes, and creative toppings. They are perfect for Halloween parties, school events, or family gatherings. Each brownie is a mini work of art that combines decadent chocolate flavor with playful decorations, making them both a treat to eat and a delight to display.
Whether you’re baking with kids or creating a centerpiece dessert for a Halloween party, these monster brownies bring the holiday to life. You can make them as goofy or as scary as you like—adding a creative touch with frosting colors, candy teeth, and wild “hair” toppings.
Why I Love This Recipe
I love this recipe because it combines two of my favorite things: brownies and playful creativity. The brownies themselves are perfectly fudgy and chocolatey, while decorating them is like a mini Halloween craft project. It’s a recipe that encourages creativity, whether you’re making goofy one-eyed monsters, multi-eyed creatures, or spooky little beasts. Kids love helping, and adults will enjoy the combination of flavor and fun presentation.
It’s a recipe that sparks joy, gets everyone into the Halloween spirit, and satisfies chocolate cravings all at once. Plus, it’s easy to customize based on your decorations and available candy.
Why It’s a Must-Try Dish
- Halloween-Themed Fun: Perfect for spooky celebrations and parties.
- Fudgy & Chocolatey: Delicious brownies with a rich, indulgent texture.
- Creative & Interactive: Decorating allows endless monster variations.
- Kid-Friendly: Safe, fun, and playful for all ages.
- Visual Appeal: Candy eyes, frosting, and toppings make them eye-catching on any dessert table.
Recipe Details
- Preparation Time: 15 minutes
- Cooking Time: 25–30 minutes
- Cooling & Decorating Time: 30–40 minutes
- Total Time: ~1 hour 30 minutes
- Servings: 12–16 brownies
- Calories: ~350 kcal per brownie
- Course: Dessert / Snack
- Cuisine: American / Holiday
Ingredients
For the Brownies:
- 1 cup (2 sticks) unsalted butter
- 2 cups granulated sugar
- 4 large eggs
- 1 tsp vanilla extract
- 1 cup all-purpose flour
- ¾ cup unsweetened cocoa powder
- ½ tsp baking powder
- ½ tsp salt
- ½ cup chocolate chips (optional, for extra fudginess)
For Decoration:
- Candy eyes (mini and regular sizes)
- Colored frosting (orange, green, purple, or black)
- Sprinkles, chocolate chips, or crushed cookies for “hair” or texture
- Edible glitter or colored sugar (optional)
Cooking Directions
Step-by-Step Preparation Method
Step 1: Prepare the Brownie Batter
- Preheat oven to 350°F (175°C).
- Grease a 9×13-inch baking pan and line with parchment paper for easy removal.
- Melt butter in a saucepan or microwave. Let cool slightly.
- In a large bowl, whisk together sugar, eggs, and vanilla until smooth.
- Gradually add melted butter to the egg mixture, mixing until combined.
- Sift together flour, cocoa powder, baking powder, and salt. Fold into the wet ingredients until just combined.
- Fold in chocolate chips if using.
Step 2: Bake the Brownies
- Pour batter into the prepared pan and spread evenly.
- Bake for 25–30 minutes, or until a toothpick inserted in the center comes out with a few moist crumbs.
- Let brownies cool completely in the pan on a wire rack before decorating.
Step 3: Prepare for Decoration
- Once brownies are cool, cut them into squares or rectangles.
- Prepare colored frosting in piping bags for decorating.
Step 4: Decorate as Monsters
- Spread or pipe frosting on each brownie as a base.
- Place candy eyes in different configurations to create one-eyed, two-eyed, or multi-eyed monsters.
- Add sprinkles, chocolate chips, or cookie crumbs for hair, teeth, or other monster features.
- Use contrasting frosting colors to create mouths, noses, or fun textures.
- Let decorations set for 10–15 minutes before serving.
How to Serve
- Arrange brownies on a Halloween-themed platter or tiered dessert tray.
- Serve with milk, hot chocolate, or themed cocktails for adults.
- Perfect for parties, bake sales, or as a fun treat for kids.
Recipe Tips
- Use room temperature eggs for smoother batter.
- Cool brownies completely before decorating to prevent frosting from melting.
- Customize each monster’s personality using candy eyes and different frosting designs.
- Store leftover brownies in an airtight container at room temperature for freshness.
- For extra fun, drizzle some chocolate or colored candy melts over the top.
Variations
- Gluten-Free Version: Substitute all-purpose flour with a gluten-free blend.
- Peanut Butter Monsters: Swirl peanut butter into the brownie batter before baking.
- Mini Monster Brownies: Bake in a mini muffin pan for bite-sized treats.
- Spooky Halloween Flavors: Add peppermint extract or orange zest to the batter for themed flavors.
- Vegan Option: Use flax eggs and plant-based butter and chocolate.
Freezing and Storage
- Room Temperature: Store in an airtight container for 3 days.
- Refrigerator: Store decorated brownies for up to 5 days.
- Freezer: Freeze undecorated brownies for up to 2 months. Thaw completely before decorating.
Special Equipment Needed
- 9×13-inch baking pan
- Parchment paper
- Mixing bowls
- Electric mixer or hand whisk
- Wire cooling rack
- Piping bags and tips for frosting (optional)
FAQ
Q1: Can I use store-bought frosting?
Yes, you can, though homemade frosting allows for easier color customization.
Q2: Can I make these ahead of time?
Yes, bake brownies up to a day in advance. Decorate just before serving for the best look.
Q3: Can I use different candy decorations?
Absolutely! Licorice, gummy candies, and chocolate chips all work for monster features.
Q4: How do I prevent frosting from sliding off brownies?
Ensure brownies are completely cooled and use a slightly thicker frosting for better adherence.
Conclusion
Halloween Monster Brownies with Candy Eyes are a fun, festive, and indulgent dessert that’s perfect for celebrating the spooky season. With fudgy chocolate brownies, creamy frosting, and playful decorations, they bring both flavor and personality to your Halloween table. Easy to make, highly customizable, and sure to delight kids and adults alike, these monster brownies are a must-try treat for the holiday.
Halloween Monster Brownies with Candy Eyes
Course: DessertsCuisine: AmericanDifficulty: easy16
servings15
minutes1
hour15
minutes1
hour30
minutesIngredients
For the Brownies:
1 cup (2 sticks) unsalted butter
2 cups granulated sugar
4 large eggs
1 tsp vanilla extract
1 cup all-purpose flour
¾ cup unsweetened cocoa powder
½ tsp baking powder
½ tsp salt
½ cup chocolate chips (optional, for extra fudginess)
For Decoration:
Candy eyes (mini and regular sizes)
Colored frosting (orange, green, purple, or black)
Sprinkles, chocolate chips, or crushed cookies for “hair” or texture
Edible glitter or colored sugar (optional)
Directions
- Step 1: Prepare the Brownie Batter: Preheat oven to 350°F (175°C). Grease a 9×13-inch baking pan and line with parchment paper for easy removal. Melt butter in a saucepan or microwave. Let cool slightly. In a large bowl, whisk together sugar, eggs, and vanilla until smooth. Gradually add melted butter to the egg mixture, mixing until combined. Sift together flour, cocoa powder, baking powder, and salt. Fold into the wet ingredients until just combined. Fold in chocolate chips if using.
- Step 2: Bake the Brownies: Pour batter into the prepared pan and spread evenly. Bake for 25–30 minutes, or until a toothpick inserted in the center comes out with a few moist crumbs. Let brownies cool completely in the pan on a wire rack before decorating.
- Step 3: Prepare for Decoration: Once brownies are cool, cut them into squares or rectangles. Prepare colored frosting in piping bags for decorating.
- Step 4: Decorate as Monsters: Spread or pipe frosting on each brownie as a base.Place candy eyes in different configurations to create one-eyed, two-eyed, or multi-eyed monsters. Add sprinkles, chocolate chips, or cookie crumbs for hair, teeth, or other monster features. Use contrasting frosting colors to create mouths, noses, or fun textures. Let decorations set for 10–15 minutes before serving.