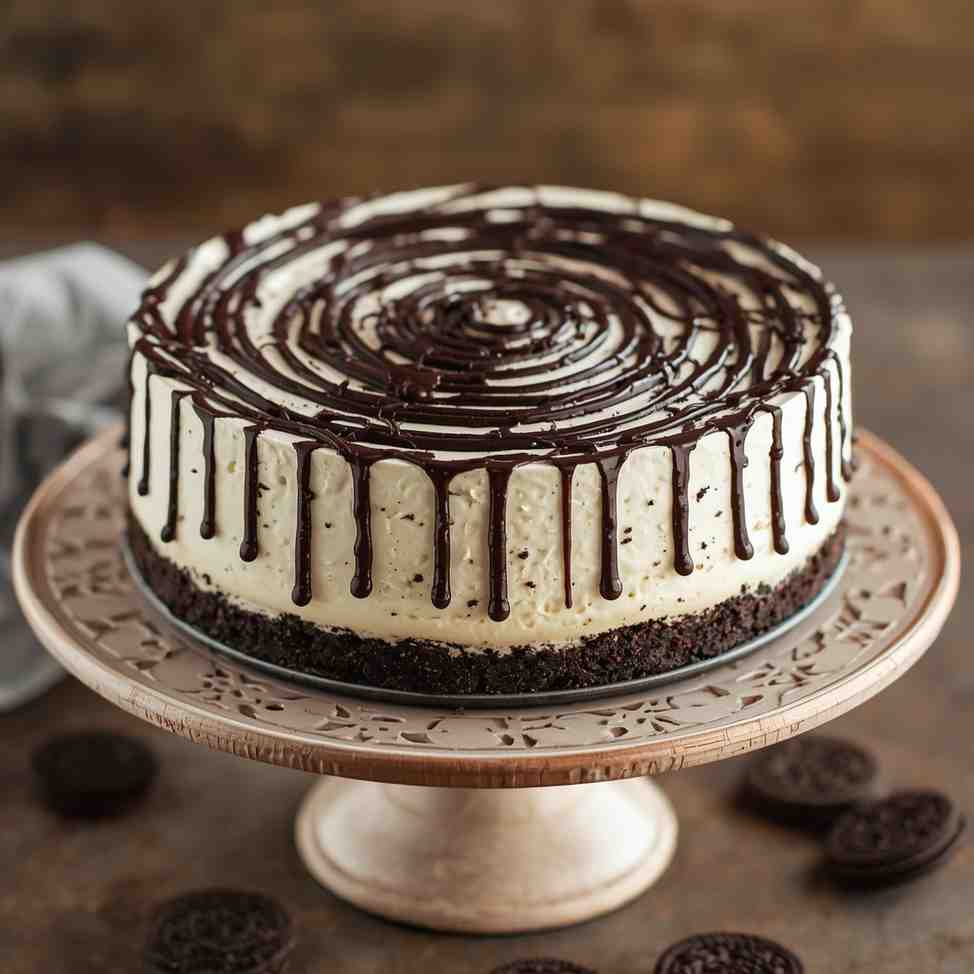
If you’re a fan of Oreos, cheesecakes, or chocolate (so… everyone ), this No-Bake Oreo Cheesecake will become your new signature dessert. It’s creamy, chocolaty, loaded with crushed cookies, and requires no oven, no water bath, and no hassle.
This is the dessert that makes you look like a pastry chef with minimal effort! It’s the perfect combination of silky cream cheese, whipped cream fluffiness, crunchy chocolate-cookie crust, and a glossy chocolate drizzle that adds decadence in every bite.
Why I Love This Recipe
- Zero baking, zero stress
- Light yet rich texture — perfect balance
- You can make it ahead and store in fridge
- Kid-approved + adults can’t resist
- Cookies in the crust and in the filling — cookie-lovers rejoice!
This dessert always disappears first at parties!
Why It’s a Must-Try
Perfect for summer or anytime you don’t want the oven on
Gorgeous presentation with minimal skill required
Highly customizable with different Oreo flavors
Pleasure + nostalgia in every bite
Recipe Details
Prep time: 25 minutes
Chilling time: 6 hours or overnight
Total time: 6 hours 25 minutes
Cooking Time : No cooking or baking required
Servings: 10–12 slices
Calories per serving: approximately 420–480 calories
Course : Dessert
Cuisine : American
Ingredients
Crust
- 24 Oreo cookies (filling included)
- 5 tbsp unsalted butter, melted
Cheesecake Filling
- 24 oz (680g) cream cheese, softened
- 1 cup powdered sugar
- 1 ½ cups heavy whipping cream, cold
- 1 tsp vanilla extract
- 12 crushed Oreos (stirred into filling)
Chocolate Drizzle + Topping
- ½ cup semi-sweet chocolate chips
- 1 tbsp coconut oil or butter
- Extra whole or crushed Oreos for topping
Step-by-Step Preparation Method
Step 1 — Make the Crust
- Crush Oreos into fine crumbs using a food processor.
- Mix with melted butter until moistened.
- Press firmly into a 9-inch springform pan.
- Chill in refrigerator while you make filling.
Step 2 — Make Cheesecake Filling
- Beat cream cheese until super smooth and fluffy.
- Add powdered sugar + vanilla → mix until combined.
- In a separate bowl, whip heavy cream to stiff peaks.
- Gently fold whipped cream into cream cheese mixture.
- Stir in crushed Oreos.
- Spread mixture over chilled crust and smooth top.
Step 3 — Add Chocolate Drizzle
- Melt chocolate chips + coconut oil in microwave 20–30 seconds at a time until smooth.
- Drizzle generously over the cheesecake.
- Add crushed or whole Oreos on top for decoration.
Step 4 — Chill
Refrigerate at least 4–6 hours, preferably overnight, until firm enough to slice.
How to Serve
- Slice using a warm knife for clean cuts
- Serve chilled — never warm
- Extra chocolate sauce or whipped cream on the side =
Perfect for birthdays, BBQs, or midnight cravings!
Recipe Tips
- Use full-fat cream cheese for best texture
- Do not overbeat once whipped cream is added
- Chill long enough — overnight = solid slice structure
- If crust crumbles → add 1–2 tbsp extra butter
Variations
| Variation | What to Change |
|---|---|
| Mint Oreo Cheesecake | Swap Oreos for mint-flavored Oreos + add peppermint extract |
| Peanut Butter Drizzle | Use peanut butter glaze instead of chocolate |
| Salted Caramel Oreo | Add caramel drizzle + a pinch of sea salt |
| Double Chocolate | Use chocolate cream Oreos + cocoa powder in filling |
| Berry Oreo | Add raspberry or strawberry sauce to contrast richness |
Storage & Freezing
| Method | Duration | Notes |
|---|---|---|
| Refrigerate | 5 days | Keep covered to prevent drying |
| Freeze whole | 2 months | Thaw overnight in fridge |
| Freeze slices | 2–3 months | Wrap individually, perfect snack portions |
Special Equipment Needed
- 9-inch springform pan
- Hand mixer or stand mixer
- Spatula & mixing bowls
- Food processor (or rolling pin + storage bag for crushing cookies)
FAQ
Q: Can I use Cool Whip instead of whipping cream?
A: Yes! Use 3 cups. It makes the texture slightly sweeter and lighter.
Q: My filling is too soft! What happened?
A: It needs more chilling time — keep it in fridge longer.
Q: Can I reduce sugar?
A: Yes, Oreos already provide sweetness! Try ¾ cup powdered sugar.
Q: Can I make mini cheesecakes?
A: Absolutely — use cupcake liners and chill for 2–3 hours.
Conclusion
This No-Bake Oreo Cheesecake with Chocolate Drizzle is the kind of dessert that brings instant smiles. It’s creamy, cookie-filled, and rich without being overly heavy — and best of all? Anyone can make it!
Whether you’re a beginner baker or simply short on time, this cheesecake promises effortless success and maximum delicious reward.
No-Bake Oreo Cheesecake with Chocolate Drizzle
Course: DessertsCuisine: AmericanDifficulty: easy12
servings25
minutes6
hours6
hours25
minutesIngredients
Crust
24 Oreo cookies (filling included)
5 tbsp unsalted butter, melted
Cheesecake Filling
24 oz (680g) cream cheese, softened
1 cup powdered sugar
1 ½ cups heavy whipping cream, cold
1 tsp vanilla extract
12 crushed Oreos (stirred into filling)
Chocolate Drizzle + Topping
½ cup semi-sweet chocolate chips
1 tbsp coconut oil or butter
Extra whole or crushed Oreos for topping
Directions
- Step 1 — Make the Crust : Crush Oreos into fine crumbs using a food processor. Mix with melted butter until moistened. Press firmly into a 9-inch springform pan. Chill in refrigerator while you make filling.
- Step 2 — Make Cheesecake Filling : Beat cream cheese until super smooth and fluffy. Add powdered sugar + vanilla → mix until combined. In a separate bowl, whip heavy cream to stiff peaks. Gently fold whipped cream into cream cheese mixture. Stir in crushed Oreos. Spread mixture over chilled crust and smooth top.
- Step 3 — Add Chocolate Drizzle : Melt chocolate chips + coconut oil in microwave 20–30 seconds at a time until smooth. Drizzle generously over the cheesecake. Add crushed or whole Oreos on top for decoration.
- Step 4 — Chill : Refrigerate at least 4–6 hours, preferably overnight, until firm enough to slice.